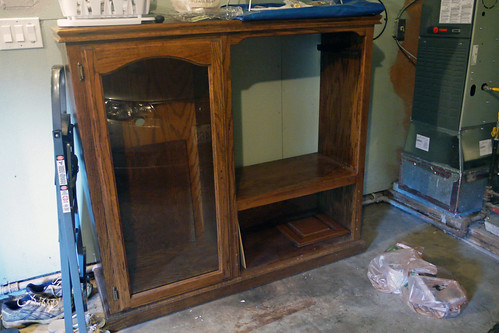
Last January, I bought an old entertainment center at Goodwill for $25. After sitting on the balcony of our old apartment and then in our garage here for many months, we finally got around to transforming it into a play kitchen for the girls' Christmas present. Here's what it looked like before we got started:
And here's what it looks like today!
Beginning in mid-November, we...
- removed all the old handles
- removed the "oven" and "dishwasher" doors
- cut holes for the sink and faucet
- cut and installed a plywood divider for between the oven and dishwasher
- cut plexiglass for the oven door
- cut a hole in the oven door for the plexiglass
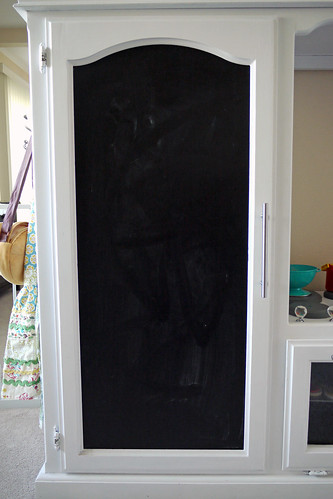
- cut chalkboard to replace the glass in the fridge door
We finished all of the above by the end of Thanksgiving weekend. We spent the next two weeks priming and painting the entire thing. This was by far the hardest part!
The week before Christmas, we...
- installed the sink and faucet (we used silicone caulk to adhere the rim of the sink to the counter)
- attached the stove burners and stove knobs
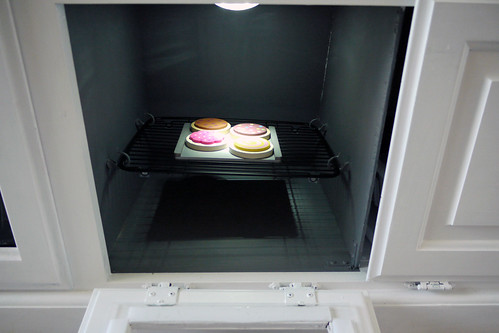
- screwed little hooks in the sides of the oven for the cooling rack
- installed the door handles
- installed the plexiglass in the oven door with heavy-duty velcro
- installed lights in the fridge and oven with heavy-duty velcro
- reinstalled the oven and dishwasher doors
- secured the chalkboard in the fridge door opening
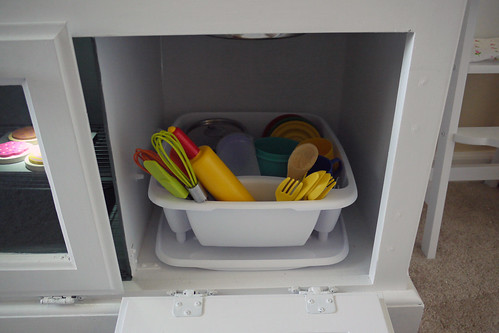
- added the cooling rack to the oven and the dish rack to the dishwasher
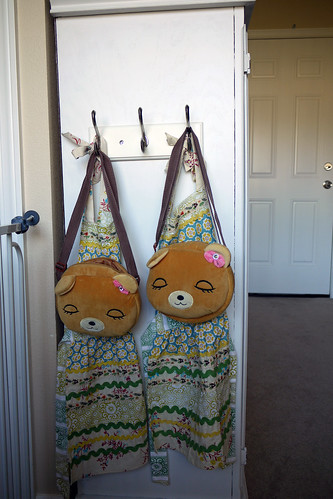
- attached a hook rack on the side of the fridge for aprons
Once the girls were in bed on Christmas Eve, we brought the kitchen into the playroom. After we anchored it to the wall, we set up all their play food and dishes inside. (We have felt food from Ikea and wooden food from Melissa & Doug. Dishes are from my own childhood with the exception of some Ikea pots.)
Now for some close-ups...
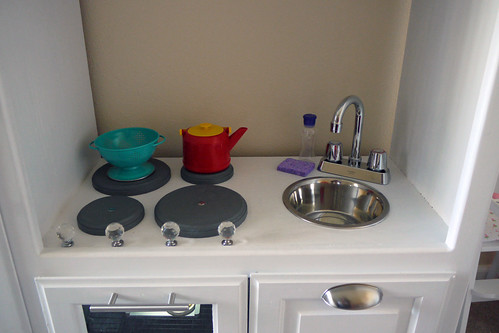
The sink is actually a dog bowl from Target and the bar faucet is from Amazon. The stove burners are just wooden rounds from JoAnn's and the knobs are from Home Depot.
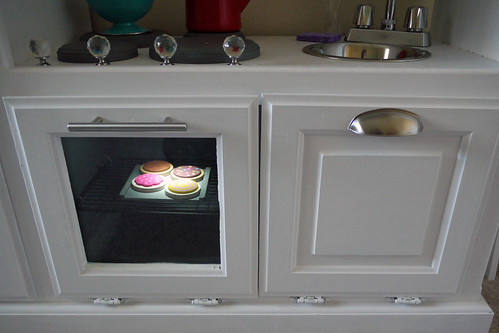
We thought we'd have to buy special fence hinges so the doors would stay up when installed this way, but the original hinges work just fine.
The oven - we put a touch light in the ceiling so it can be "turned on." After lots of searching for the required dimensions on Amazon, we bought this sink rack.
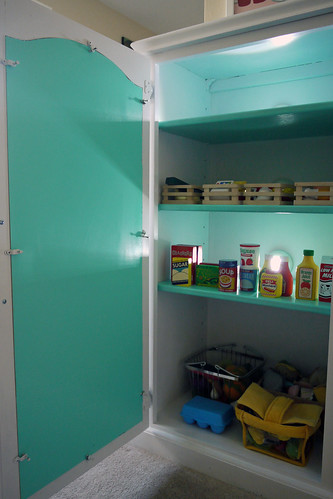
And here's the refrigerator. All the door handles are from Home Depot, by the way. The old hinges are bronze, so we painted them white but it's already peeling. I think we'll eventually replace them for coordinating silver ones.
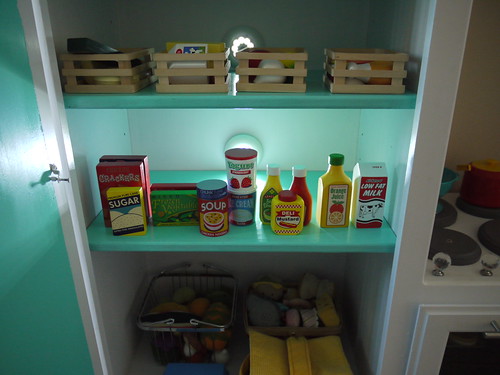
We painted the shelves and the back of the chalkboard with turquoise paint left over from the doll bunk beds. It was nice to add in some color without much more effort. (Painting the whole fridge interior a different color would definitely have been more work!)
There were some holes in the back for tv cords and cables, so we used some more touch lights to cover those up. It's handy that they also give it more of a fridge feel.
The darling Anthropologie aprons were a splurge a while back. I have the coordinating adult apron, oven mitts, and potholders so I just couldn't resist. The hook rack is from Target and my mom brought back the little purses from China.
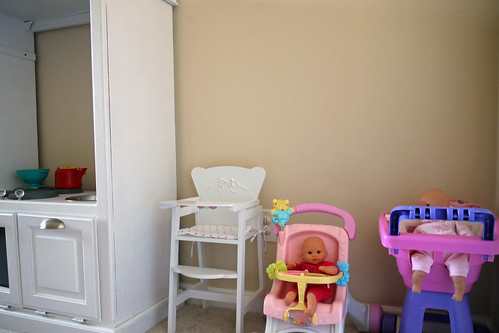
Adam's mom sent this high chair for Christmas, so that was another fun surprise. Claire immediately started feeding her dolly breakfast on Christmas morning.
For Claire's birthday in March, we plan to add a few extras. To that blank wall, maybe a corded phone, a mail box, or a bar for dish towels? We'll add a back above the sink/stove area, wallpapered or painted a fun color, with a little window and curtains, etc.
We took all of our inspiration from Young House Love and Southern Revivals.
Here was the rough budget breakdown:
Entertainment Center - $25
Hook Rack - $12
Faucet - $21
Dog Bowl - $17
Oven Rack - $12
Dish Rack - $6
Touch Lights - $28
Plywood - $10
Chalkboard - $10
Plexiglass - $10
Stove Knobs - $24
Door Handles - $22
Corner Braces - $9
Plexiglass Cutting Tool - $5
Quart of Primer - $10
Test Pot of Gray Paint - $3
Grand Total = $224
So, it was certainly a lot more expensive than one of those cute KidKraft kitchens, but it's also considerably bigger and sturdier. We're hoping those factors will give it more longevity. It was also considerably cheaper than a well-constructed kitchen like one you'd find at Pottery Barn Kids.
Whew! It was a lot of work, but so worth it to see their excited faces on Christmas morning. Maybe next year we'll build them a grocery stand to go with it?


That looks amazing!
ReplyDeleteThis is really great, Caitlin! What a labor of love and it turned out beautifully. :)
ReplyDeleteVery cute - great job. I know that must have taken a lot of work and imagination!
ReplyDelete